The BBC and Master Computer Public Domain Library
Writing EEPROMs For The BBC Model B
Programming EEPROMs for the BBC Computer using the PC.
I haven't had an EPROM programmer for the BBC computer for many years and didn't really need one until just recently when I was asked to program an EPROM for a plotter. There are quite a number of articles about this subject. I found a couple of threads on Stardot and this one by Speculatrix very helpful.
This article describes how I did it.
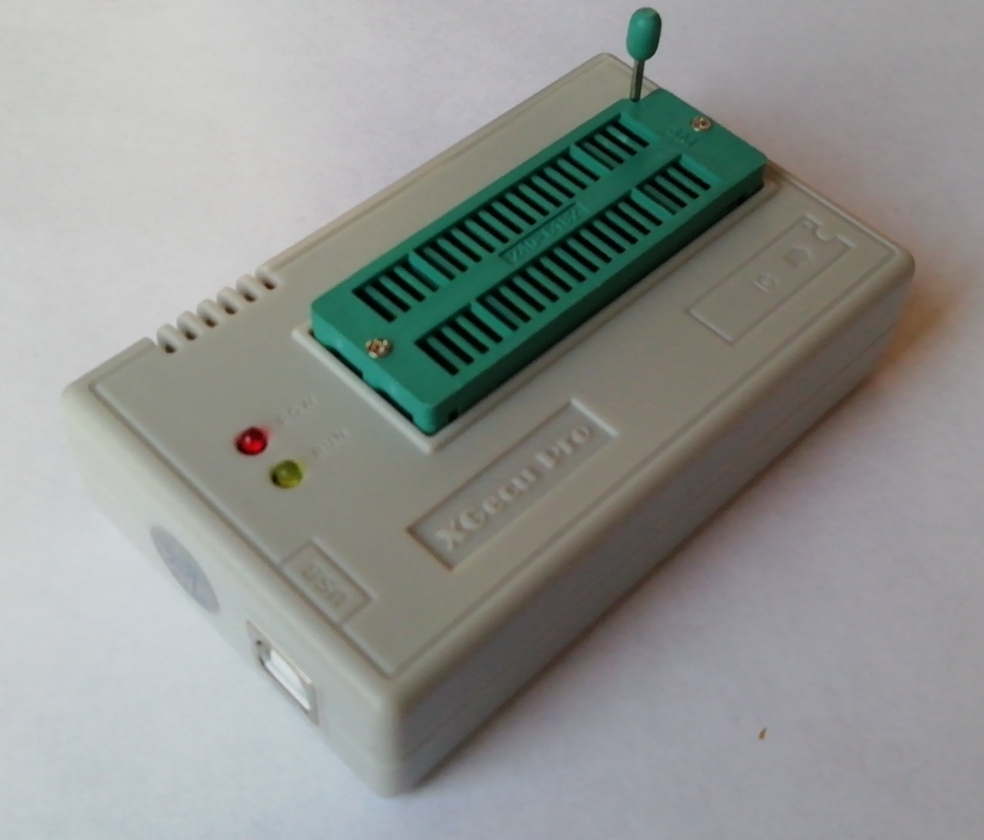
I bought an XGecu Pro (XGPro) TL866II Plus programmer from Amazon for £60.99p. The contents of the box:

Also, some ATMEL AT28C256 EEPROMs. Now I was a little concerned that this might be a counterfeit device as I had seen reports of there being problems with the software bricking programmers. The website that is the official download page for the software to operate the programmer Autoelectric has a page that very helpfully shows differences between counterfeit versions and the genuine thing. One check for instance is to count the number of vents in the top left corner of the casing. According to the website, six is the genuine article, seven is a counterfeit.

The software is downloaded from the Autoelectric website. It's wise to virus check anything downloaded and the software (xgprov1080_setup.rar) gave this result:

One of the many virus checkers came back positive, most likely false but all the same, I never risk it when there is no need. I have an old laptop that is easily restored using Macrium Reflect so the software is on that rather than my desktop. The installation process went smoothly enough: Run the .exe and click to install the driver.

Reboot the laptop. The laptop runs Vista and for some reason, the XGpro folder in 'All Programs' showed as empty and there was no shortcut on the desktop as the instructions said there was supposed to be. However, the software was showing in the directory where it was supposed to be, so I created a shortcut to it and all worked well. The software started up and auto detected the programmer I was using.
The software initially demands an update to the firmware. I had read stories of the device being bricked at this stage, maybe being caused by counterfeit hardware. Fortunately, I can't confirm this as the firmware update went smoothly and was done in a few seconds.
Next, I chose the EEPROM that I was using from the huge list in the 'Select IC' tab.

The AT28C256 EEPROMs are 32k, a BBC Computer can only access the top 16k of this. Although there is a workaround, making it possible to put two ROM images onto one EEPROM. It is a hardware modification involving fastening a wire to pin 1 of the EEPROM and the other end of the wire to pin 12 of IC76 which is a 74LS163. Thanks to 1024MAK on Stardot for this info, I have not been able to try this myself but have every reason to believe it works.

Now to the actual burning of the chip. Select the 'Load' icon and choose the ROM image file you want to burn. The screen grab below shows the settings I used. The ROM image has to be loaded in to the top half of the 32K of the AT28C256 in. Loaded from &4000. The start point in the file is 0000 as you want to load the whole image in from start to end. Back on the main screen (above here). Ensure the tick boxes in 'options' at the bottom of the window are as shown in the screen grab above here. Select the 'Prog.' icon to first erase, then program and finally verify the chip. It's all over in a few seconds.

Note that if you are using the full 32k by loading in two ROM image files, the settings will be 'File start address' 0000, to 'Buffer start' 0000 for the first ROM image and then 'File start address' at 0000, 'Buffer Start Address' at 4000 with 'Clear buffer when loading file' set to 'Disable'. Otherwise you will spend all day loading in images wondering where the previous one went.
I would like to hear from anyone that has tried this.
